Musings
an Online Journal of Sorts
By Alyce Wilson
August 31, 2004 - Portrait Tweaking
I'm having a very busy week at work, so I'm going to try to come up with Musings that don't take as much writing.
Recently, someone requested a photo of me for an interview she's going to do for a Croatian magazine. I'm not sure if the interview will focus on Wild Violet or on my various experiences with the supernatural. But regardless, I didn't have any good recent photos. So this past weekend, I had The Gryphon take some.
There was one pose I liked, but it needed work. Here's what I did with it, in stages.
Original photo (cropped)
This photo has been cropped down from the original photo, which had more empty space to the left.
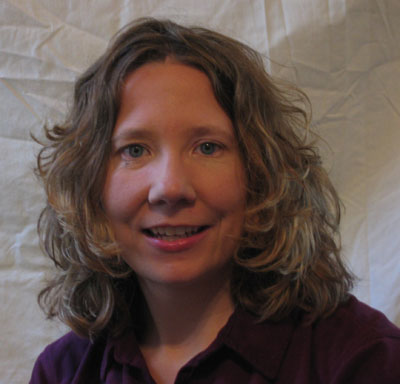
Step One - Auto Levels
The original photo was too dark, so I used PhotoShop's "Auto Levels" in the "Image" menu to quickly adjust levels and contrast.

Step Two - Makeup Retouched
I noticed there was some stray mascara under my right eye (the left one in the photo), so I used the paint brush to paint it the same color as the rest of my skin, then used the "smudge" tool to blend it in.
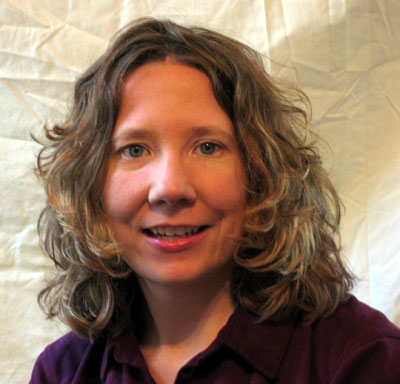
Step Three - Auto Color
I wasn't happy with the adjustments that the auto levels had made. I felt my face was still too reddish. Using "Auto Color" (in the "Image" menu) helped correct that. I don't like to adjust the color balance manually unless I have a really good idea of the effect I'm trying to achieve, since it's too easy to accidentally turn your photo greenish or give it some other unnatural cast.
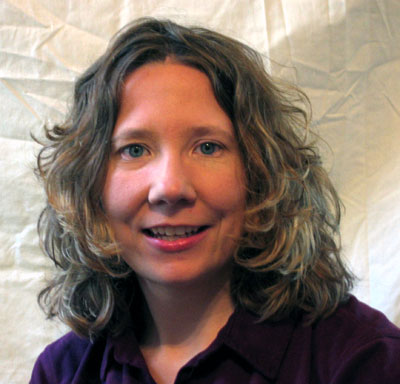
Step Four - Diffuse Glow
Now admittedly, one of the problems with this photo was the lighting in the room. We tried several different ways to adjust it, and it was difficult because I don't own any professional lighting equipment. After several attempts at opening and closing blinds, the above shot was the best lighting balance we could achieve with what I had available. So just for fun, I tried the "Diffuse Glow" effect under "Distort" in the "Filter" menu.
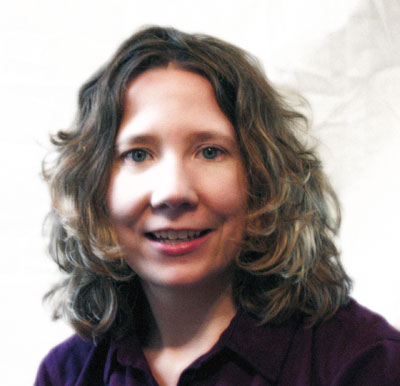
Step Five - Desaturate
I actually liked the way that this softened up the lighting and made it a more dramatic portrait. The above color photo (step four) was the one I sent to the reporter. But I also discovered that by using the "Desaturate" option under the "Image" menu, it makes a great black and white portrait.
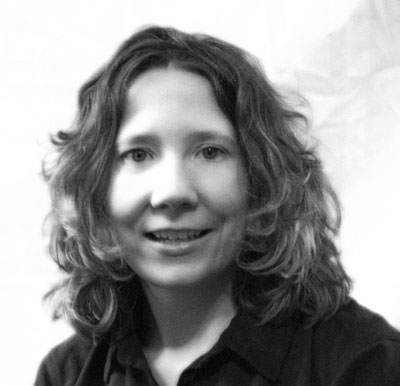
This one is both dramatic and useable for a wide variety of purposes, including future press releases, perhaps. Or just for sharing with friends and family.
I go through similar photo tweaking whenever I share photos with family and friends, which is why it might sometimes take me several days to get recent digital photos into online albums for sharing. In this case, I went for a deliberately dramatic effect, but in most cases, I consider my tweaking a success if no one viewing it would think that anything had been done.
Moral:
Snapshots are taken quickly; portraits take time.
Copyright
2004 by Alyce Wilson
What
do you think? Share your thoughts
at Alyce's message board (left button):
![]()
![]()

